

Recipe for Fried Chicken and Rice
A Southern classic paired with one of the world’s greatest staple foods.
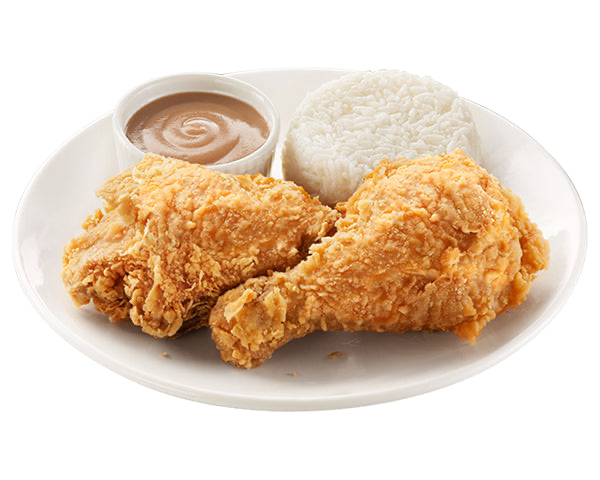
Photo courtesy of Jollibee USA
Fried chicken is among America’s most famous and beloved dishes. While many of us are aware of fried chicken’s roots in the South. There’s a bit more to it than that. According to an article by the BBC, the history of fried chicken is indeed a far more interesting story than meets the eye, as far as its origins go at least! In fact, there’s ongoing debate among some culinary experts as to where fried chicken really comes from. The most popular and most likely theory of how fried chicken came to be identifies Scotland as fried chicken’s place of birth. Proponents of this theory claim the technique of frying battered chicken in lard originated in Scotland and eventually came to the Americas with British colonization. As this was happening, cookbooks featuring recipes which included Scottish techniques were being published. Settlers would bring these cookbooks with them to their colonies. Some of the settlers owned slaves, and imparted onto them those cookbooks. With the knowledge they gained from those Scottish recipes, African Americans added their own flair, combining Scottish fried chicken with new spices. This led to the birth of Southern fried chicken. One major misconception is that slaves would cook and eat fried chicken on a regular basis. The truth is, fried chicken was not a meal that slaves enjoyed often, let alone everyday. It was reserved for special occasions. Despite its Scottish origins, one can’t deny nor discredit the role that enslaved African Americans played in making fried chicken what it is today. Southern fried chicken is a part of the legacy of slavery. We can’t trivialize that fact. Understood that way, fried chicken is unmistakably American. Ever since the advent of fast food and refrigeration, fried chicken has become something of a global sensation; it has taken the world by storm. At the vanguard of fried chicken’s ascension to global fame was Kentucky Fried Chicken, founded by “Colonel” Harland Sanders. KFC now operates in 150 countries. War can also be attributed for fried chicken’s global popularity. One example of this is the Philippines, where African-American soldiers introduced the dish to it’s people during the country’s liberation from Japan in the closing stages of WW2. Nearly forty years after the war’s end, out came Jollibee, a Filipino fast-food chain specializing in fried chicken whose success and rise in popularity testifies to just how much people across the world love this dish. As a Filipino-American, this is how fried chicken came into my life: fast food! It was my resulting curiosity for how Jollibee’s style of fried chicken was prepared that really sparked my love for cooking. Rest assured that the recipe which I share is one that I’ve been working for a good bit of time. When I first started making fried chicken, I would use this premade flour mix from the Philippines called, “Crispy Fry”. I was motivated to outdo myself, so I made my own blend of herbs and spices á la KFC. My seasoning blend started out with just four items: salt, black pepper, smoked paprika, and garlic powder. I used to put celery salt in the mix at the very start but I wasn’t too much of a fan. I’ve since added white pepper, cayenne pepper, and most controversially, MSG. Before you go on reading my recipe, there are a couple of things that you should know. First, if you’re uncomfortable using MSG, do feel free to omit it. Second, there is an optional step where you fry the chicken a second time. If you’re a big fan of crunchy chicken skin, do it. With that out of the way, let’s get cooking!
Ingredients:
8 boneless skinless chicken thighs
For the marinade/brine:
- 1 tablespoon of salt
- 1 tablespoon of black pepper
- 1 tablespoon of smoked paprika
- 1 tablespoon of garlic powder
- 1 tablespoon of dried rosemary
- 1 tablespoon of cayenne pepper
- 2 teaspoons of MSG (Accent)
- 3 tablespoons of vinegar-based hot sauce (like Frank’s, Crystal, or Tabasco)
- 1 ½ cups of buttermilk
- or regular milk mixed with 1 tsp of white vinegar or the juice of a lemon
For the breading/dredge:
- 1 ½ cups of all-purpose flour
- ¾ cups of cornstarch or potato starch
- 1 ½ teaspoon of salt
- ½ teaspoon of MSG
- 1 tablespoon of fine ground black pepper
- 1 teaspoon of white pepper
- 2 teaspoons of garlic powder
- 1 teaspoon of smoked paprika
- 2 teaspoons of cayenne pepper
For the rice:
- 2 cups of long-grain white rice (preferably Jasmine)
- 2 cups of water
Directions:
- In a large bowl (one which can at least hold 2 quarts) combine buttermilk and hot sauce. Mix thoroughly until the buttermilk has turned a light red. Next, add the salt, pepper, smoked paprika, garlic powder, rosemary, cayenne pepper, and MSG into the buttermilk mixture. At this point, add the chicken to the bowl. Use your hands to mix the seasoning, buttermilk, and chicken together. As you’re mixing the chicken, feel for coarse spots. If you feel any, this means you have to mix more so that it mostly feels smooth. This will be the brine which the chicken will be submerged under. Allow to marinate for at least 6 hours in the refrigerator and up to 24. The longer it stays in the fridge, the better it will taste. Don’t go past 24 hours as that will change the chicken’s texture; it will still be juicy but it will become tough.
- In a large pot or dutch oven (ideally 5 quarts in capacity), add 1 quart of vegetable oil and heat over medium-high until it’s at 350℉. Use either an instant-read thermometer or a chopstick to gauge the temperature. When using a chopstick, there is only one indication of whether the oil is sufficiently heated. If it starts bubbling, it means it’s ready to use.
- As the oil is heating, add flour, cornstarch, salt, MSG, black pepper, white pepper, garlic powder, smoked paprika, and cayenne pepper to another large bowl. This will serve as the chicken’s dredge, or breading. Remove the brined chicken from the bowl piece by piece while making sure to shake off any excess buttermilk. Put the chicken pieces on a large surface like a baking sheet so they’re safe in one place.
- Dump half of the dredge onto the chicken pieces. Coat each piece by rolling it around in the dredge and lightly pressing on them. One tip I have is, before you even coat the chicken pieces, mix in a few spoonfuls of the buttermilk brine into your dredge to make little clumps of flour. These clumps create more surface texture, meaning more crunchiness. If the chicken isn’t fully coated, add more of the dredge and coat the chicken accordingly. As soon as you complete coating each piece of chicken, begin frying the chicken in batches of 3, no more than 4 to prevent overcrowding in the pot. Before doing this, make sure again that the oil is at least 350℉. When placing the chicken in the pot, be careful. Do this by placing the pieces away from you to avoid potential injury.
- When you finish putting all 3 or 4 chicken pieces in the pot, wait 30 seconds and grab tongs. Use the tongs to slightly agitate the chicken pieces to separate them from each other. Cook for about 10 minutes or until the exterior of the chicken pieces are a nice light golden brown. They should not be pale. Throughout those 10 minutes, flip the chicken, however, many times you need to maintain an even color on the exterior. Don’t forget to monitor the temperature of the oil frequently. At first, the oil should have dropped to around 300℉ when putting the chicken in, but it should climb back up to 325-350℉. If you find that the exterior isn’t brown enough to your liking, feel free to turn your stovetop’s knobs a little more. Although it’s counterintuitive, the constant adjustment of heat is what’s crucial to making great fried chicken at home.
- Instead of using time or the chicken’s color to determine its doneness, use an instant-read thermometer. Pull the chicken out when it’s around 165℉, preferably less. Although 165℉ is the temperature at which chicken should be served, and for good reason (all pathogens die at that temperature), don’t be afraid to pull the chicken at 160℉ or even 155℉, since the carryover heat will cook the chicken to the right temperature. This carryover heat effect is pronounced with dark meat as it’s fatty. Alternatively, you can use something that can pierce the chicken, like a fork or wooden skewer, to check the color of the liquid that runs out. If it’s clear, it should be good to go and ready to serve. If it’s red, cook for more time until that liquid becomes clear. Use this in addition to your visual cues.
- Rest chicken on a paper towel lined plate or a wire rack with paper towels underneath it.
- (Optional) Let the chicken cool for at least half an hour and up to overnight. Remove any sediment from the oil using a spider strainer. Reheat oil to 400℉. Cook in batches of 2 . Take the chicken pieces out when they’ve turned a nice, deep golden brown. Rest the chicken on paper towels once more for an additional 5 minutes.
Directions (for the rice, rice cooker):
- Add 2 cups of white rice to a bowl. Fill that bowl with enough water to submerge the rice. With your hands, stir the rice and water for about 30 seconds. You should see the water turn from transparent to white and opaque. This is because of the starch the rice has on its surface, which this process is removing. Removing the starch is done to make the rice less clumpy. Pour out as much of that starchy water as you can. If you wish, you can use a colander or a fine mesh strainer to remove all of the starchy water. Repeat this process of washing the rice until the water becomes noticeably clearer, around 5-6 times.
- If you have a rice cooker skip to steps 6 and 7. The following steps cover how to cook rice on a stovetop.
- Transfer the rice into a saucepan. Instead of adding the 2 cups of water mentioned above in the ingredients list, use 2 ½ cups of water (or 3 ½ cups if you’re specifically using jasmine rice).
- Turn on the stove to medium heat and let the rice heat until the water boils. At which point, set your heat to low and allow to simmer for 15 minutes. After that time, eliminate the heat, remove the saucepan from the stove, and let the rice rest for 10-15 minutes. Keep the lid on while the rice is resting.
- Remove the lid and, using a fork, mix the rice to break up any clumps which formed during cooking. Scrape off those grains of rice which have attached themselves to the sides of the saucepan, too. Doing this is known as “fluffing” the rice. Rest for an additional 5 minutes and serve!
- Transfer the washed rice to your rice cooker’s inner pot. To that, add 2 cups of water and quickly, and with a little force, shake the pot around in a circle so that the rice flattens into an even layer. Place the pot back into the rice cooker and cover with the lid. Activate your rice cooker to the appropriate setting.
- Once your rice cooker indicates that it is done cooking, allow the steam to escape first by resting the rice for at least 10 minutes. That means just leaving the rice in the cooker. Once that time has passed, remove the lid and use a plastic paddle to mix the rice so that the grains on the bottom are moved to the top. You’re supposed to “mix upwards” in other words. This is also called “fluffing” the rice. By doing this, you separate the rice grains and prevent excess clumping.
- Rest the rice for a final time (5 minutes is good enough) and serve! Happy eating!

Seth Ebio is a Staff Writer for the Lincolnian who’s currently in his second year writing for the paper. In his spare time, he likes to cook and noodle...


Test User 2 • Sep 7, 2023 at 5:08 PM
This is also a test comment.
Test User • Sep 7, 2023 at 5:07 PM
This is a test comment.
Anonymous • Sep 7, 2023 at 5:07 PM
This is a test comment.
Ellen Yeager • Sep 7, 2023 at 1:17 PM
Test Comment